First steps
Once you have followed the steps in the Installation section to install the Operator and its dependencies, you will now deploy a Airflow cluster and its dependencies. Afterwards you can verify that it works by running and tracking an example DAG.
Setup
As we have installed the external dependencies required by Airflow (Postgresql and Redis) we can now install the Airflow cluster itself.
Supported versions for PostgreSQL and Redis can be found in the Airflow documentation.
Secret with Airflow credentials
A secret with the necessary credentials must be created, this entails database connection credentials as well as an admin account for Airflow itself. Create a file called airflow-credentials.yaml:
---
apiVersion: v1
kind: Secret
metadata:
  name: simple-airflow-credentials
type: Opaque
stringData:
  adminUser.username: airflow
  adminUser.firstname: Airflow
  adminUser.lastname: Admin
  adminUser.email: airflow@airflow.com
  adminUser.password: airflow
  connections.secretKey: thisISaSECRET_1234
  connections.sqlalchemyDatabaseUri: postgresql+psycopg2://airflow:airflow@airflow-postgresql.default.svc.cluster.local/airflow
  connections.celeryResultBackend: db+postgresql://airflow:airflow@airflow-postgresql.default.svc.cluster.local/airflow
  connections.celeryBrokerUrl: redis://:redis@airflow-redis-master:6379/0
And apply it:
kubectl apply -f airflow-credentials.yamlThe connections.secretKey will be used for securely signing the session cookies and can be used for any other security related needs by extensions. It should be a long random string of bytes.
connections.sqlalchemyDatabaseUri must contain the connection string to the SQL database storing the Airflow metadata.
connections.celeryResultBackend must contain the connection string to the SQL database storing the job metadata (in the example above we are using the same postgresql database for both).
connections.celeryBrokerUrl must contain the connection string to the Redis instance used for queuing the jobs submitted to the airflow worker(s).
The adminUser fields are used to create an admin user.
Please note that the admin user will be disabled if you use a non-default authentication mechanism like LDAP.
Airflow
An Airflow cluster is made of up three components:
-
webserver: this provides the main UI for user-interaction -
workers: the nodes over which the job workload will be distributed by the scheduler -
scheduler: responsible for triggering jobs and persisting their metadata to the backend database
Create a file named airflow.yaml with the following contents:
---
apiVersion: airflow.stackable.tech/v1alpha1
kind: AirflowCluster
metadata:
  name: airflow
spec:
  image:
    productVersion: 2.6.1
    stackableVersion: 23.7.0
  clusterConfig:
    executor: CeleryExecutor
    loadExamples: true
    exposeConfig: false
    credentialsSecret: simple-airflow-credentials
  webservers:
    roleGroups:
      default:
        replicas: 1
  workers:
    roleGroups:
      default:
        replicas: 2
  schedulers:
    roleGroups:
      default:
        replicas: 1
And apply it:
kubectl apply -f airflow.yaml
Where:
-
metadata.namecontains the name of the Airflow cluster -
the label of the Docker image provided by Stackable must be set in
spec.version -
spec.statsdExporterVersionmust contain the tag of a statsd-exporter Docker image in the Stackable repository. -
spec.executor: this setting determines how the cluster will run (for more information see https://airflow.apache.org/docs/apache-airflow/stable/executor/index.html#executor-types): theCeleryExecutoris the recommended setting althoughSequentialExecutor(all jobs run in one process in series) andLocalExecutor(whereby all jobs are run on one node, using whatever parallelism is possible) are also supported -
the
spec.loadExampleskey is optional and defaults tofalse. It is set totruehere as the example DAGs will be used when verifying the installation. -
the
spec.exposeConfigkey is optional and defaults tofalse. It is set totrueonly as an aid to verify the configuration and should never be used as such in anything other than test or demo clusters. -
the previously created secret must be referenced in
spec.credentialsSecret
Please note that the version you need to specify for spec.version is not only the version of Apache Airflow which you want to roll out, but has to be amended with a Stackable version as shown. This Stackable version is the version of the underlying container image which is used to execute the processes. For a list of available versions please check our
image registry.
It should generally be safe to simply use the latest image version that is available.
|
This will create the actual Airflow cluster.
Initialization of the Airflow database
When creating an Airflow cluster, a database-initialization job is first started to ensure that the database schema is present and correct (i.e. populated with an admin user). A Kubernetes job is created which starts a pod to initialize the database. This can take a while.
You can use kubectl to wait on the resource, although the cluster itself will not be created until this step is complete.:
kubectl wait airflowdb/airflow \
  --for jsonpath='{.status.condition}'=Ready \
  --timeout 300s
The job status can be inspected and verified like this:
kubectl get jobswhich will show something like this:
NAME      COMPLETIONS   DURATION   AGE
airflow   1/1           85s        11m
Then, make sure that all the Pods in the StatefulSets are ready:
kubectl get statefulsetThe output should show all pods ready, including the external dependencies:
NAME                        READY   AGE
airflow-postgresql          1/1     16m
airflow-redis-master        1/1     16m
airflow-redis-replicas      1/1     16m
airflow-scheduler-default   1/1     11m
airflow-webserver-default   1/1     11m
airflow-worker-default      2/2     11m
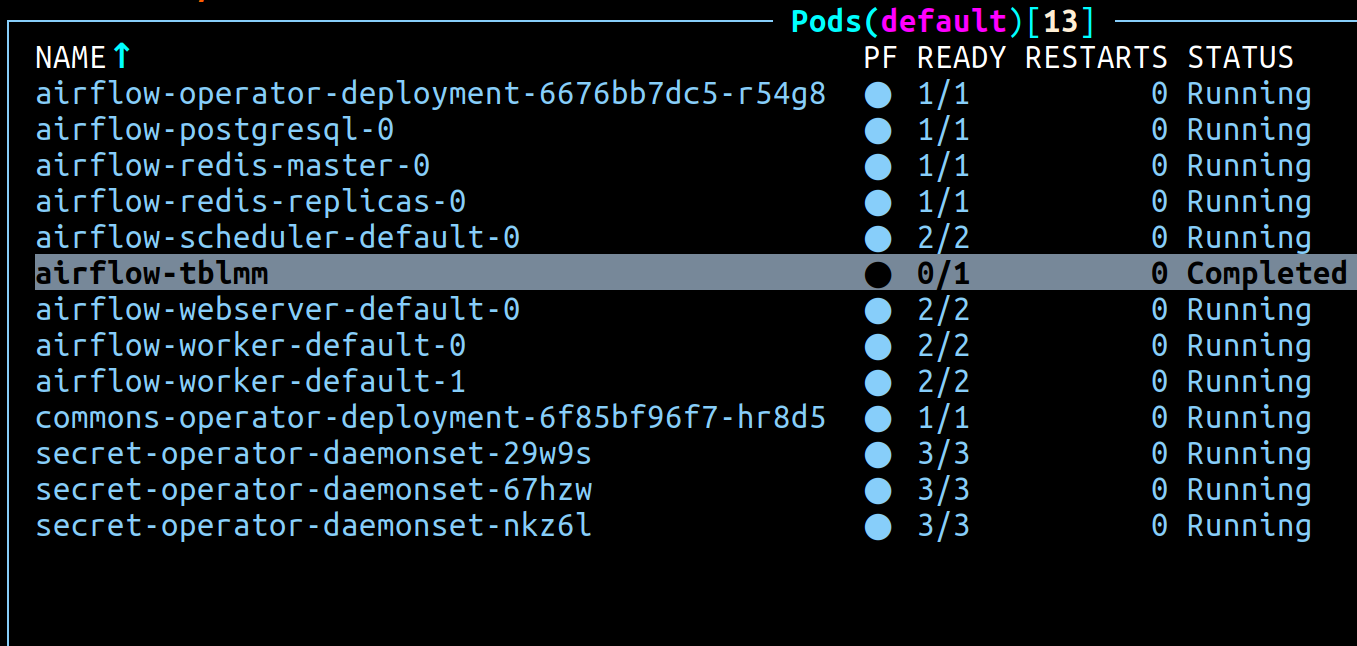
The completed set of pods for the Airflow cluster will look something like this:

When the Airflow cluster has been created and the database is initialized, Airflow can be opened in the
browser: the webserver UI port defaults to 8080 can be forwarded to the local host:
kubectl port-forward svc/airflow-webserver 8080 2>&1 >/dev/null &
Verify that it works
The Webserver UI can now be opened in the browser with http://localhost:8080. Enter the admin credentials from the Kubernetes secret:

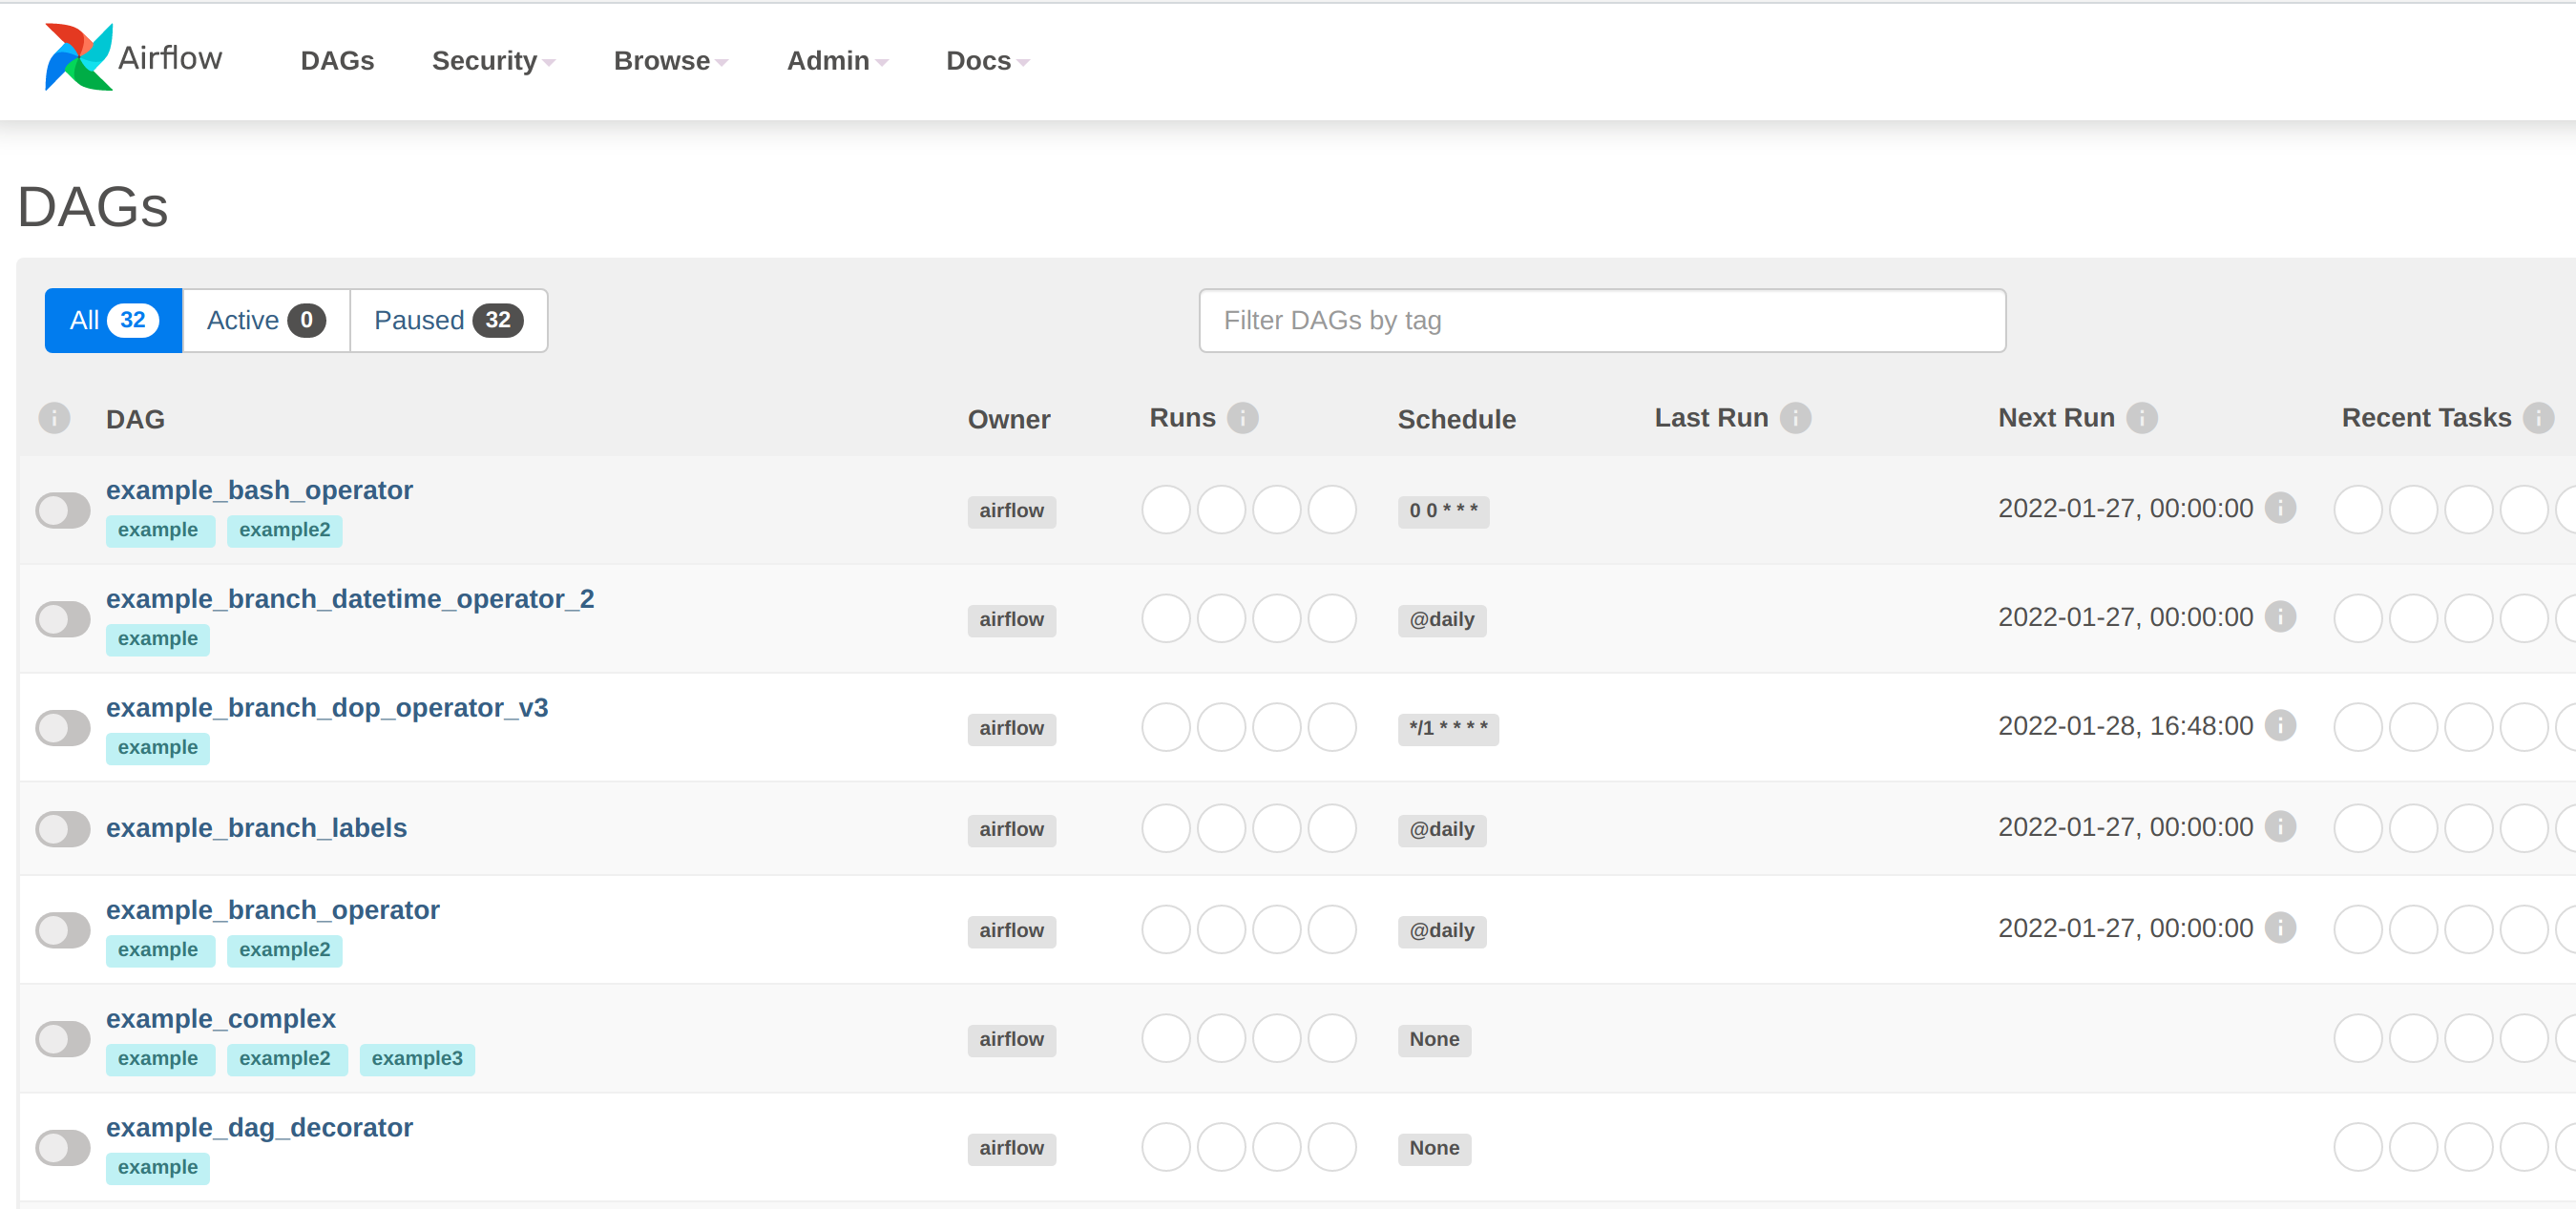
Since the examples were loaded in the cluster definition, they will appear under the DAGs tabs:

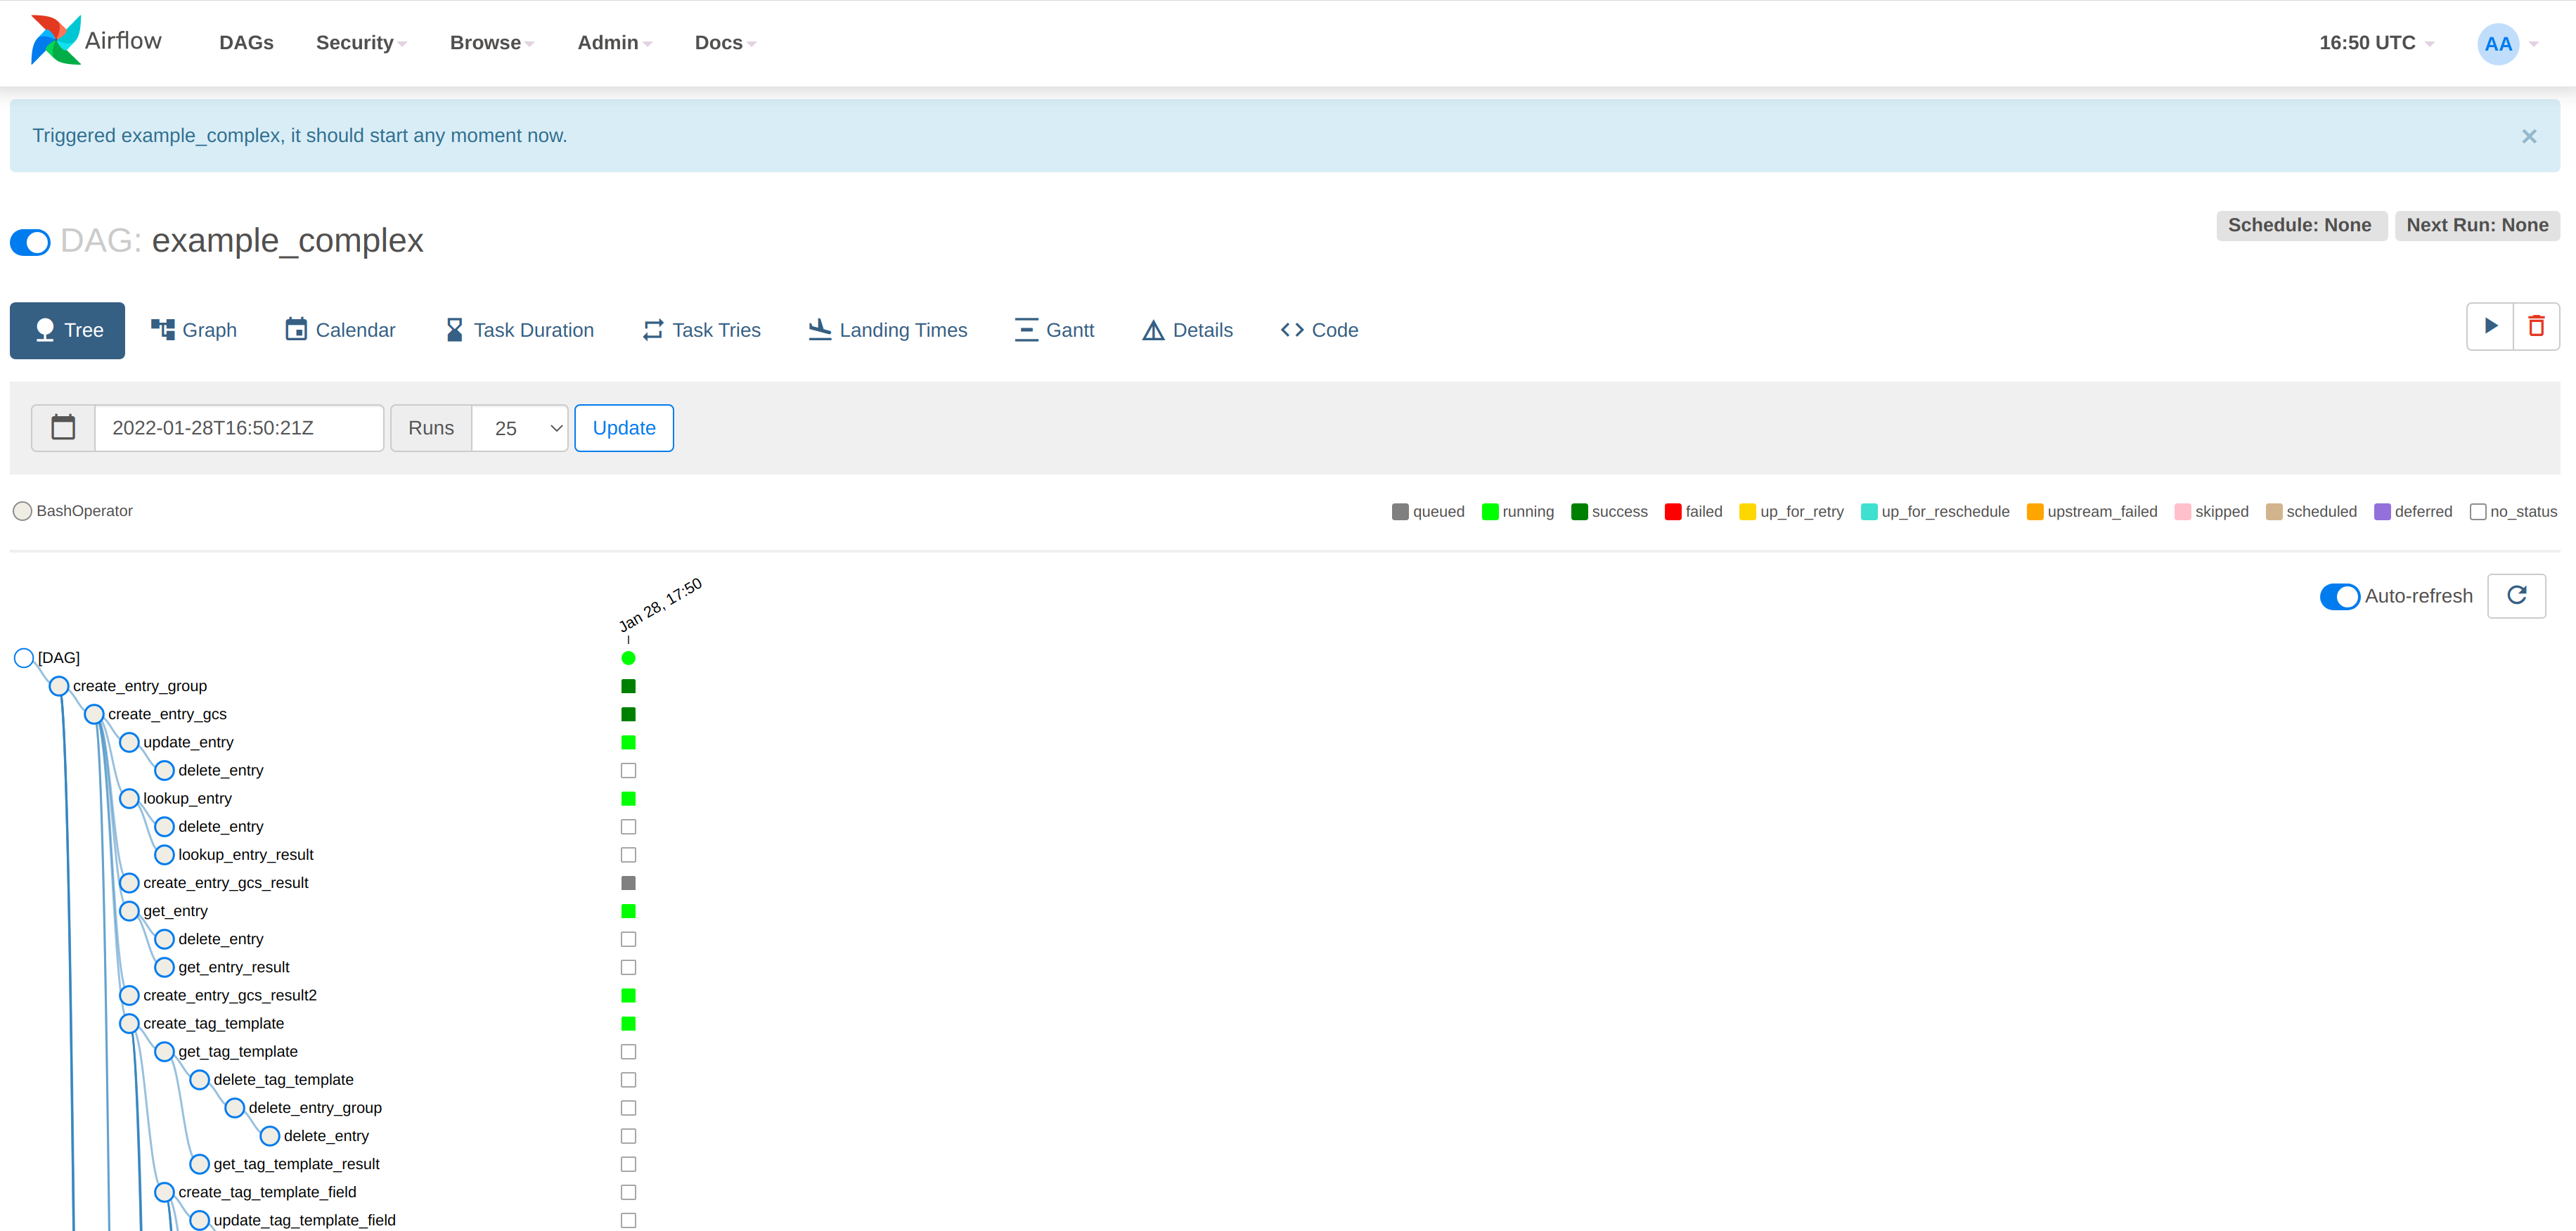
Select one of these DAGs by clicking on the name in the left-hand column e.g. example_complex. Click on the arrow in the top right of the screen, select "Trigger DAG" and the DAG nodes will be automatically highlighted as the job works through its phases.

Great! You have set up an Airflow cluster, connected to it and run your first DAG!
Alternative: Using the command line
If you prefer to interact directly with the API instead of using the web interface, you can use the following commands. The DAG is one of the example DAGs named example_complex. To trigger a DAG run via the API requires an initial extra step to ensure that the DAG is not in a paused state:
  curl -s --user airflow:airflow -H 'Content-Type:application/json' \
    -XPATCH http://localhost:8080/api/v1/dags/example_complex \
    -d '{"is_paused": false}'
A DAG can then be triggered by providing the DAG name (in this case, example_complex). The response identifies the DAG identifier, which we can parse out of the JSON like this:
  curl -s --user airflow:airflow -H 'Content-Type:application/json' \
    -XPOST http://localhost:8080/api/v1/dags/example_complex/dagRuns \
    -d '{}' | jq -r '.dag_run_id'
If we read this identifier into a variable such as dag_id (or replace it manually in the command) we can run this command to access the status of the DAG run:
  curl -s --user airflow:airflow -H 'Content-Type:application/json' \
    -XGET http://localhost:8080/api/v1/dags/example_complex/dagRuns/"$dag_id" | jq -r '.state'
What’s next
Look at the Usage guide to find out more about configuring your Airflow cluster and loading your own DAG files.