Setting up an end-to-end data pipeline
In this tutorial you will set up a data pipeline, from raw data to visualization. You read data from S3 using NiFi, send it to Kafka, from there it is ingested into Druid, and lastly you visualize the data using Superset.
About this tutorial
The purpose of this tutorial is a deeper exploration of the Stackable platform and its features. It is not a guide to building a robust data pipeline.
This tutorial is intended to run in a private network or lab; it does not enable many security features such as authentication or encryption and should not be directly connected to the Internet. Be careful if you are deploying in the cloud as your instances may default to using public IPs.
Before you begin
You should make sure that you have everything you need:
-
A running Kubernetes cluster
-
kubectl to interact with the cluster
-
Helm to deploy third-party dependencies
-
stackablectl to install and interact with Stackable operators
While we recommend to use stackablectl, you can also install operators from the Helm Chart repository:
helm repo add stackable-stable https://repo.stackable.tech/repository/helm-stable/Instructions for installing via Helm are also provided throughout the tutorial.
-
Shell utilities like
catandcurl
Nifi and Kafka
This section shows how to instantiate the first part of the entire processing chain, which will ingest CSV files from an S3 bucket, split the files into individual records and send these records to a Kafka topic.
Deploy the Operators
The resource definitions rolled out in this section need their respective Operators to be installed in the K8s cluster. For example, running a Kafka instance requires the Kafka Operator.
Secret Operator
The Secret Operator is needed by the Stackable Operator for Apache NiFi, as NiFi requires the UI to be served via HTTPS. The necessary certificates and keys for this are provided by the Secret Operator to the NiFi Pods.
stackablectl operator install secretUsing Helm instead
helm install secret-operator stackable-stable/secret-operatorZooKeeper Operator
Apache NiFi and Apache Kafka both use Apache ZooKeeper as backing config storage, so the Stackable Operator for Apache ZooKeeper has to be installed in order to make sure that a ZooKeeper cluster can be rolled out. There is no need to install multiple ZooKeeper clusters, as NiFi, Kafka and Druid can share the same cluster via provisioning a ZNode per backed service.
stackablectl operator install zookeeperUsing Helm instead
helm install zookeeper-operator stackable-stable/zookeeper-operatorDeploying ZooKeeper
Since both Kafka and NiFi depend on Apache ZooKeeper, we will create a ZooKeeper cluster first.
kubectl apply -f - <<EOF
---
apiVersion: zookeeper.stackable.tech/v1alpha1
kind: ZookeeperCluster
metadata:
  name: simple-zk
spec:
  version: 3.8.0-stackable0.7.1
  servers:
    roleGroups:
      default:
        selector:
          matchLabels:
            kubernetes.io/os: linux
        replicas: 1
        config: {}
EOF
Deploying Kafka and NiFi
To deploy Kafka and NiFi you can now apply the cluster configuration. Run the following command in the console to deploy and configure all three services.
kubectl apply -f - <<EOF
---
apiVersion: zookeeper.stackable.tech/v1alpha1
kind: ZookeeperZnode
metadata:
  name: simple-kafka-znode
spec:
  clusterRef:
    name: simple-zk
---
apiVersion: kafka.stackable.tech/v1alpha1
kind: KafkaCluster
metadata:
  name: simple-kafka
spec:
  version: 3.2.0-stackable0.1.0
  zookeeperConfigMapName: simple-kafka-znode
  brokers:
    config:
      resources:
        storage:
          logDirs:
            capacity: '2Gi'
        cpu:
          max: '500m'
          min: '250m'
        memory:
          limit: '1Gi'
    roleGroups:
      default:
        replicas: 1
---
apiVersion: zookeeper.stackable.tech/v1alpha1
kind: ZookeeperZnode
metadata:
  name: simple-nifi-znode
spec:
  clusterRef:
    name: simple-zk
---
apiVersion: v1
kind: Secret
metadata:
  name: nifi-admin-credentials-simple
stringData:
  username: admin
  password: supersecretpassword
---
apiVersion: nifi.stackable.tech/v1alpha1
kind: NifiCluster
metadata:
  name: simple-nifi
spec:
  version: 1.16.3-stackable0.1.0
  zookeeperConfigMapName: simple-nifi-znode
  config:
    authentication:
      method:
        singleUser:
          adminCredentialsSecret: nifi-admin-credentials-simple
          autoGenerate: true
    sensitiveProperties:
      keySecret: nifi-sensitive-property-key
      autoGenerate: true
  nodes:
    config:
      resources:
        memory:
          limit: "1"  # Option
        cpu:
          min: "2"  # Option
          max: "3" # Option
        storage:
          contentRepo:
            capacity: "10Gi"  # Option
          databaseRepo:
            capacity: "20Gi" # Option
          flowfileRepo:
            capacity: "20Gi" # Option
          provenanceRepo:
            capacity: "20Gi" # Option
          stateRepo:
            capacity: "20Gi"
    roleGroups:
      default:
        selector:
          matchLabels:
            kubernetes.io/os: linux
        config:
          log:
            rootLogLevel: INFO
          resources:
            memory:
              limit: "1Gi"  # Option
            cpu:
              min: "2"  # Option
              max: "3" # Option
            storage:
              contentRepo:
                capacity: "10Gi"  # Option
              databaseRepo:
                capacity: "20Gi" # Option
              flowfileRepo:
                capacity: "20Gi" # Option
              provenanceRepo:
                capacity: "20Gi" # Option
              stateRepo:
                capacity: "20Gi"
        replicas: 1
EOF
The Nifi installation will take several minutes due to the size of the images.
Process the data and write to Kafka
After all Pods are successfully deployed the NiFi web interface should be accessible. To retrieve the appropriate URL you can run the following command:
kubectl get svc simple-nifi -o json | jq -r --argfile endpoints <(kubectl get endpoints simple-nifi -o json) --argfile nodes <(kubectl get nodes -o json) '($nodes.items[] | select(.metadata.name == $endpoints.subsets[].addresses[].nodeName) | .status.addresses | map(select(.type == "ExternalIP" or .type == "InternalIP")) | min_by(.type) | .address | tostring) + ":" + (.spec.ports[] | select(.name == "https") | .nodePort | tostring)'This will output all UI endpoints for the NiFi cluster, the only thing you need to do is prepend 'https://' when accessing the UI in your browser. If your browser warns you that the connection is not secure (because of a self-signed certificate) you must continue to the unsafe variant.
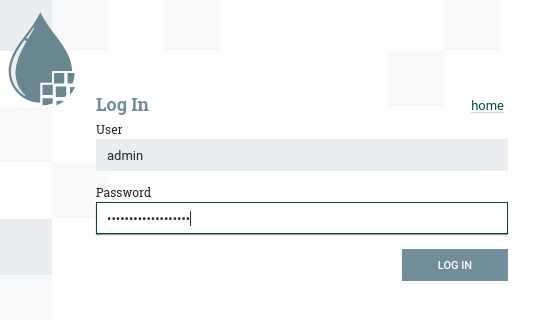
The login credentials are defined in the NiFi example.
Unless you changed these before deploying the cluster you will be able to log in with admin / supersecretpassword.
Once you have successfully logged in you should be presented with the NiFi UI showing an empty canvas. This canvas is the main place where you will interact with NiFi. You can drag processors on here, configure them as needed and connect these processors to create a flow that offers the processing that you need.
| As this guide is not intended to be a NiFi guide most of NiFi’s features will be glossed over and only very brief instructions provided on what needs to be done to get the flow up and running. |
A template for a flow for this tutorial is provided here. Download the template.
In order to upload the template to NiFi, click on the upload template button in the UI and specify the appropriate file.
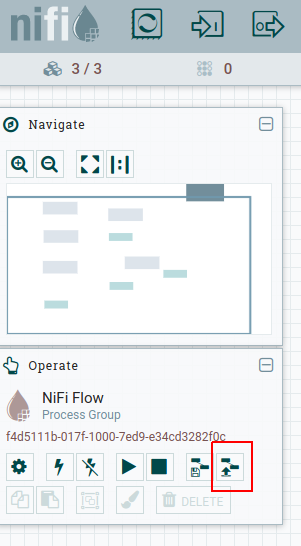
To deploy the template as a flow you need to click on the template button in NiFi’s main menu and drag it over the canvas.

After you have done this, you should be presented with a process group named "S3 Kafka" on your canvas that is almost ready to start processing data. The only thing that still needs doing is to enable some ControllerServices used by the processors.
To get to these services you can double-click on the process group and then right-click on the SplitRecord processor, go to the properties tab and click on one of the small arrows next to the Record Reader and Record Writer options.
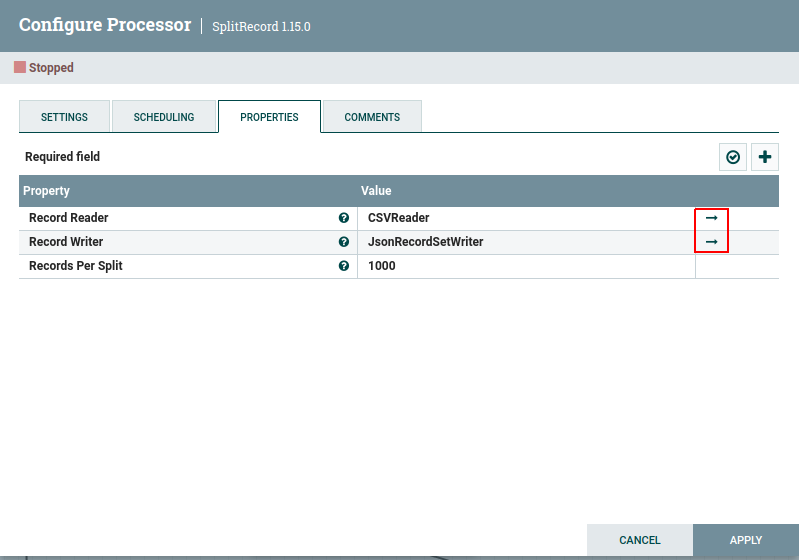
On the controller page, enable all three services by clicking on the small lightning symbol next to every service. You will be presented with a confirmation dialog but no further action should be needed here.

Once this is done return to the main canvas and you are ready to start your flow and get data going. To start the entire flow make sure that you do not have any processors selected by simply clicking on the empty canvas anywhere. If you click the start button now, NiFi will start all processors and data should start flowing through and end up in the pre-configured Kafka topic.
| The flow in its packaged form has been restricted to only download a small subset of the yellow taxi dataset, as the full size data is fairly large. If you have the capacity to process all data you can remove this restriction in the prefix property of the ListS3 processor to do so, as shown in the screenshot below. |
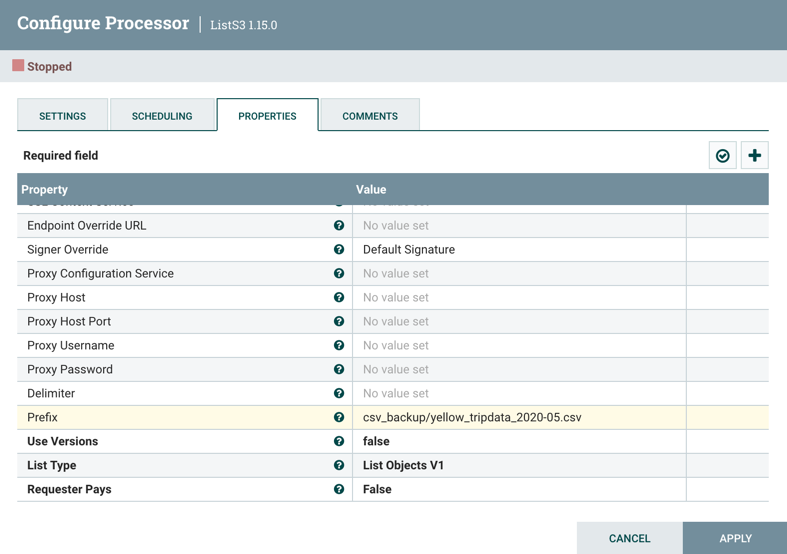
If you change the highlighted value to csv_backup/yellow_tripdata_ all data for yellow cabs will be downloaded.
Druid
Now that the taxi data has been read from S3, processed in NiFi and written to a Kafka topic, you can read from that Kafka topic to ingest the data into a Druid data set.
You will set up the Operator and some dependencies, provision a Druid cluster and then do the data ingestion from Kafka into Druid - first through the Druid web interface and then from the command line.
Deploy the Stackable Druid Operator
Like the other Operators, the Druid Operator is easily installed with Helm:
stackablectl operator install druidUsing Helm instead
helm install druid-operator stackable-stable/druid-operatorSet up dependencies
While the Operator already runs, Druid itself needs an SQL database for metadata and either HDFS or an S3 object storage for deep storage of data segments. It also needs a ZooKeeper instance for the individual processes to communicate with each other.
Metadata storage
For the Metadata storage install a PostgreSQL database with the bitnami Helm Chart:
helm install postgresql-druid \
    --repo https://charts.bitnami.com/bitnami postgresql \
    --set auth.username=druid \
    --set auth.password=druid \
    --set auth.database=druid \
    --version 11.0.0
The database name, as well as user and password are all druid, you will need these later when configuring the Druid cluster to use the database.
Deep storage
Druid requires a backing storage (so called Deep-Storage) where data - partitioned by date or time - is persisted as immutable segments. Druid can use either local storage (only appropriate for stand-alone testing - i.e. all druid components run on the same machine), S3 or HDFS. In this guide you will use S3, specifically MinIO which is an S3-implementation suitable for low-footprint scenarios. Deploy a MinIO instance to use as the Druid deep storage, using the MinIO Helm chart:
helm install minio \
  --repo https://charts.min.io/ minio \
  --set resources.requests.memory=8Gi \
  --set mode=standalone \
  --set replicas=1 \
  --set persistence.enabled=false \
  --set "buckets[0].name=nytaxidata,buckets[0].policy=none" \
  --set "users[0].accessKey=minioAccessKey,users[0].secretKey=minioSecretKey,users[0].policy=readwrite"
|
The access credentials minioAccessKey and minioSecretKey given above will be reused further down in a Secret read by Druid to access the MinIO object storage.
ZooKeeper
You already installed the ZooKeeper Operator and set up a cluster when you set up NiFi and Kafka. Now all you need to do, is deploying a dedicated ZNode for Druid to use to ensure no Druid properties collide with other properties written to ZooKeeper. Simply deploy a ZNode resource:
kubectl apply -f - <<EOF
apiVersion: zookeeper.stackable.tech/v1alpha1
kind: ZookeeperZnode
metadata:
  name: simple-druid-znode (2)
spec:
  clusterRef:
    name: simple-zk
EOF
Deploy the Druid cluster
Now that the Operator and Dependencies are set up, you can deploy the Druid cluster. The credentials for the MinIO instance are not written directly into the cluster resource, but in a dedicated Secret which is then referenced in the cluster resource:
kubectl apply -f - <<EOF
---
apiVersion: secrets.stackable.tech/v1alpha1
kind: SecretClass
metadata:
  name: druid-s3-credentials
spec:
  backend:
    k8sSearch:
      searchNamespace:
        pod: {}
---
apiVersion: v1
kind: Secret
metadata:
  name: druid-s3-credentials
  labels:
    secrets.stackable.tech/class: druid-s3-credentials
stringData:
  accessKey: minioAccessKey
  secretKey: minioSecretKey
EOF
And now the cluster definition:
kubectl apply -f - <<EOF
apiVersion: druid.stackable.tech/v1alpha1
kind: DruidCluster
metadata:
  name: druid-nytaxidata
spec:
  version: 0.23.0-stackable0.1.0
  zookeeperConfigMapName: simple-druid-znode  (1)
  metadataStorageDatabase:  (2)
    dbType: postgresql
    connString: jdbc:postgresql://postgresql-druid/druid
    host: postgresql-druid
    port: 5432
    user: druid
    password: druid
  ingestion:
    s3connection:
      inline:
        host: http://minio
        port: 9000
        accessStyle: Path
        credentials:
          secretClass: druid-s3-credentials  (3)
  deepStorage:
    s3:
      bucket:
        inline:
          bucketName: nytaxidata
          connection:
            inline:
              host: http://minio
              port: 9000
              accessStyle: Path
              credentials:
                secretClass: druid-s3-credentials (3)
  brokers:
    configOverrides:
      runtime.properties:
        druid.s3.enablePathStyleAccess: "true"
    roleGroups:
      default:
        selector:
          matchLabels:
            kubernetes.io/os: linux
        config: {}
        replicas: 1
  coordinators:
    configOverrides:
      runtime.properties:
        druid.s3.enablePathStyleAccess: "true"
    roleGroups:
      default:
        selector:
          matchLabels:
            kubernetes.io/os: linux
        config: {}
        replicas: 1
  historicals:
    configOverrides:
      runtime.properties:
        druid.s3.enablePathStyleAccess: "true"
    roleGroups:
      default:
        selector:
          matchLabels:
            kubernetes.io/os: linux
        config: {}
        replicas: 1
  middleManagers:
    configOverrides:
      runtime.properties:
        druid.s3.enablePathStyleAccess: "true"
    roleGroups:
      default:
        selector:
          matchLabels:
            kubernetes.io/os: linux
        config: {}
        replicas: 1
  routers:
    configOverrides:
      runtime.properties:
        druid.s3.enablePathStyleAccess: "true"
    roleGroups:
      default:
        selector:
          matchLabels:
            kubernetes.io/os: linux
        config: {}
        replicas: 1
EOF
Note that all the dependencies you set up above are referenced in the cluster definition:
| 1 | ZooKeeper Druid ZNode |
| 2 | PostgreSQL access |
| 3 | MinIO credentials secret |
Data ingestion
There are different ways to get data into Druid, all of which will use a POST of a Druid-compatible ingestion specification. This tutorial guides you through two ways of doing this, either directly in the Druid UI, or - this is e.g. useful if the job is to be repeated - by extracting the ingestion specification into a JSON file and issuing a curl from the command line (some of what follows is also covered in more depth in the official Druid documentation, but is mentioned here for the sake of completeness).
Ingestion with the Druid web interface
The Druid web interface is accessible on the Router Pod of the Druid cluster. The Operator created a Service for the Router, from which you port-forward the port 8888 where the web interface is served:
kubectl port-forward svc/druid-nytaxidata-router 8888Keep this command running to continue accessing the Router port locally.
The UI should now be reachable at http://localhost:8888 and should look like the screenshot below. Start with the "Load Data" and "New Spec" option:
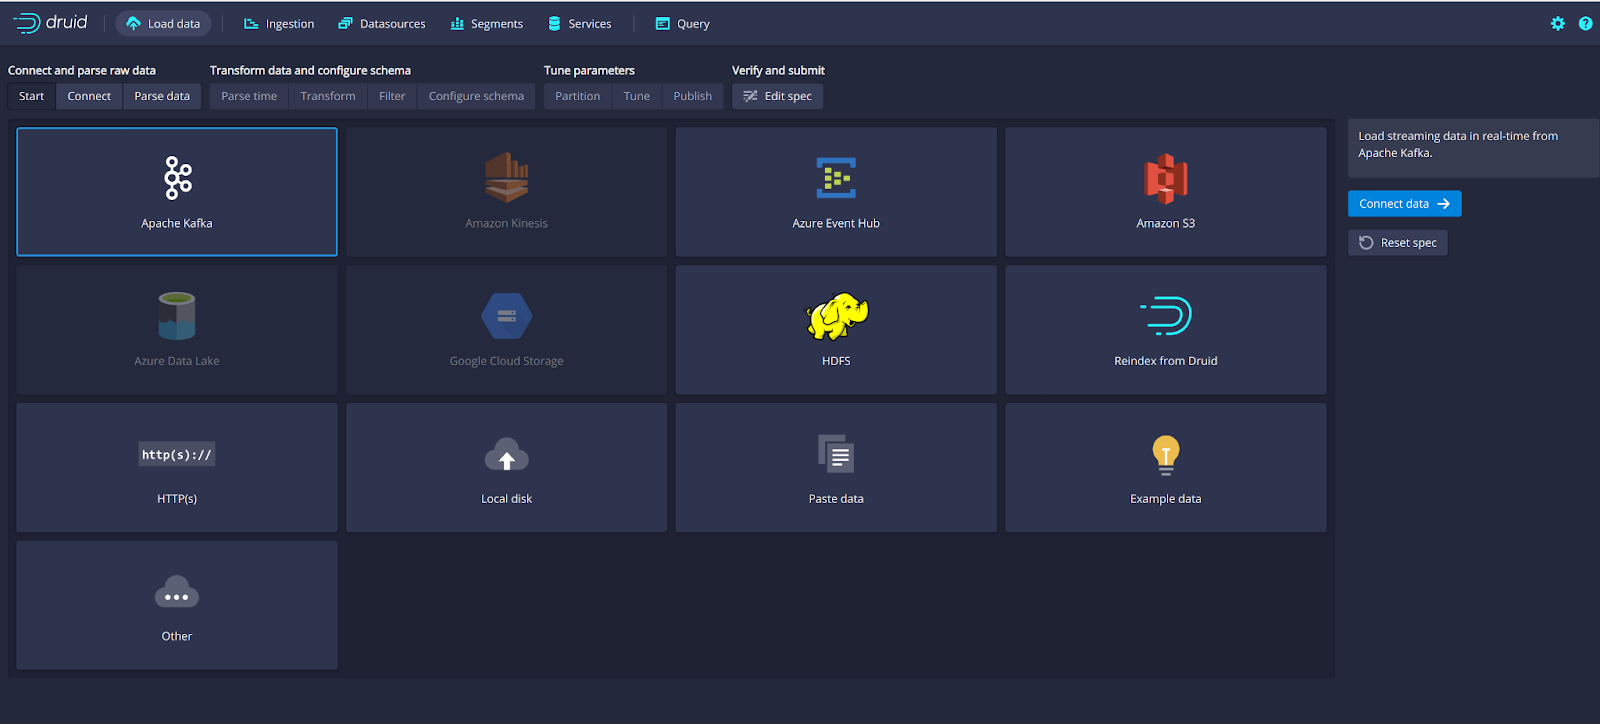
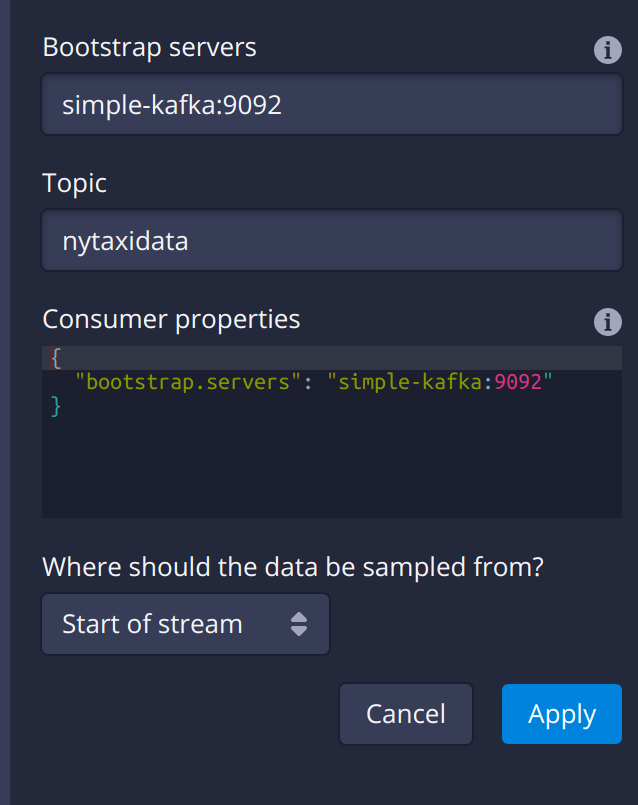
Select "Apache Kafka" and then "Connect Data" at the right of the screen, entering the following in the two available fields:
-
Bootstrap servers:
simple-kafka:9092 -
Topic:
nytaxidata
Then select "Start of stream" and then "Apply":
At the bottom right of the screen click through
-
“Parse Data”, “Parse Time”, “Transform”, “Filter”, “Configure Schema”
without changing anything. At the next step - “Partition” - select day for the granularity:

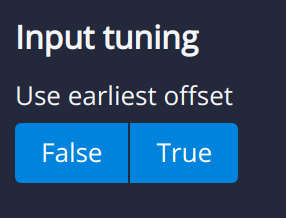
Then click on “Tune”. At this point you instruct Druid on how to manage the Kafka offsets. As this is the initial read action choose “True” so that Kafka starts at the earliest possible offset (subsequent reads will pick up from the last offset that Druid has cached internally):
Click through “Publish” to show “Edit spec”. At this point you have a complete ingestion job specification in JSON format:
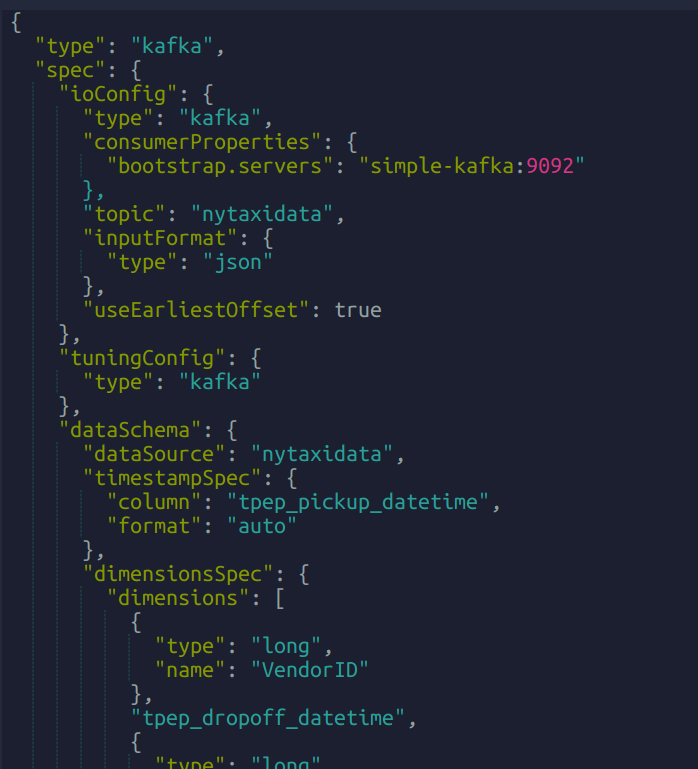
Now click on the final step on the bottom (“Submit”) and the job will start running - since the job is a streaming job it will wait for fresh Kafka data in the specified topic and ingest it into Druid. However, before doing that, save the JSON specification in a separate file (e.g. /tmp/kafka-ingestion-spec.json) as you will use it later to start this job from the command line using curl.
Back at the screen, click on “Submit” - the ingestion job will be started, which takes a few moments. As mentioned already, the job is a streaming job, so it will continue to run in the background (i.e. the status remains RUNNING):

The magnifying glass icon shows metadata such as logs, spec-definition etc.:

Once the ingestion job has been started, Druid monitors the relevant Kafka topic for changes and ingest new data, persisting it in its deep storage. It can take a few moments for the first segments to be ready (and a bit longer until they are published as immutable segments in deep storage). The streaming job will stay at RUNNING until it is stopped manually. The data source is visible under the “Datasources” tab, where the individual segments - partitioned by time slice - can also be examined:

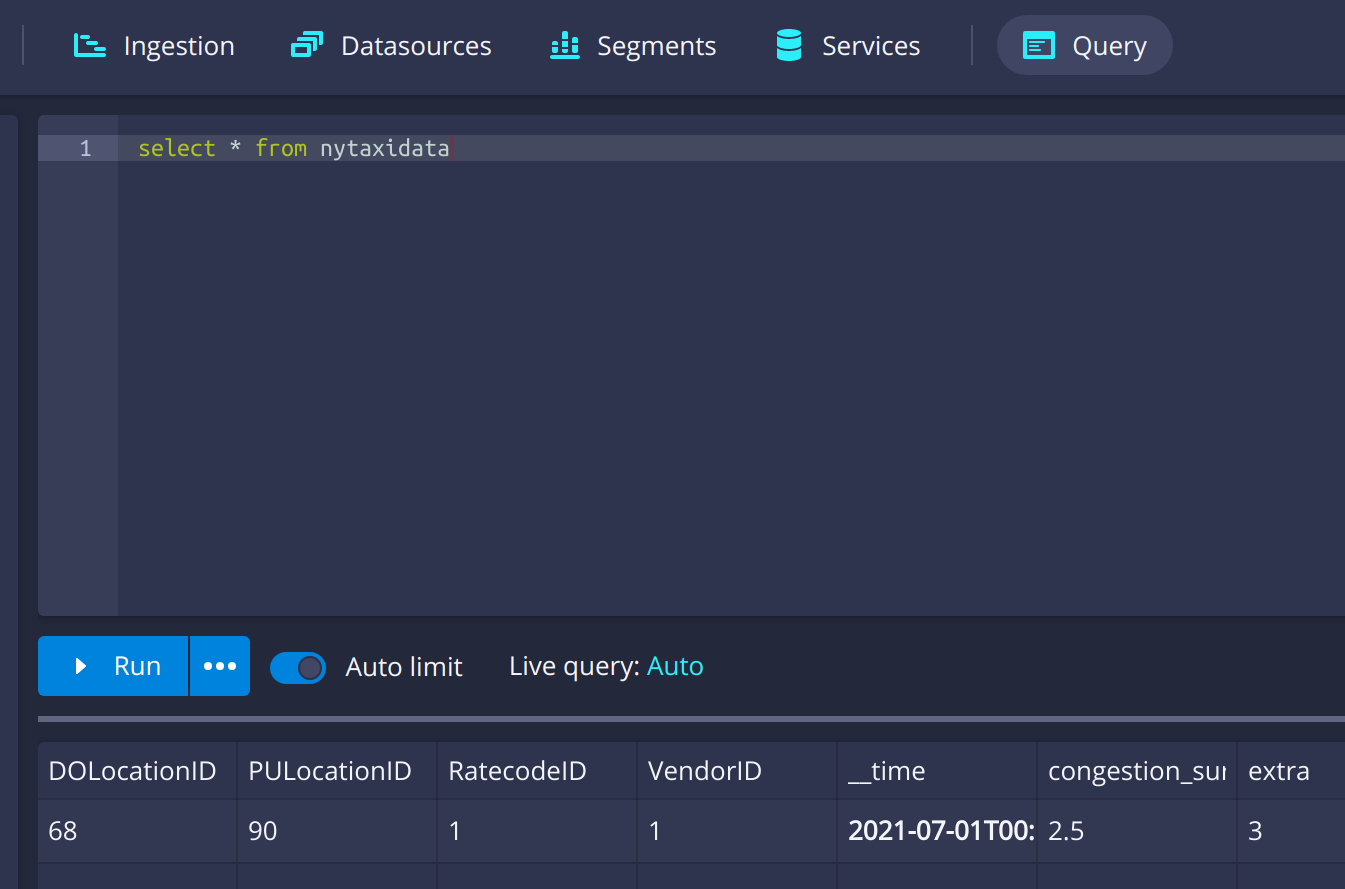
To display data from the data source, use the SQL editor under the “Query” tab:
Ingestion with curl
An ingestion job can also be started from the commandline, using a JSON specification and curl to submit it. In this example, the JSON specification file is /tmp/kafka-ingestion-spec.json.
As before, issue a port-forwarding command to access the Druid from outside the Kubernetes cluster; but now for the coordinator instead of the router:
kubectl port-forward svc/druid-nytaxidata-coordinator 8081Again, keep this command running to keep the port forwarded.
Now, issue a HTTP POST request via curl, referencing the JSON specification file:
curl -X POST -H 'Content-Type: application/json' -d @/tmp/kafka-ingestion-spec.json http://localhost:8081/druid/indexer/v1/supervisorThis should yield a status code of 200 with a response of {"id":"nytaxidata"}.
| You have extracted the ingestion specification from the UI, where the data source was created as part of the process, but you could also run this job without an existing data source, as the job will create it if needed. |
Superset
To analyze the data in Druid, the steps below explain how you can connect a Superset instance to your Druid instance and read and visualize the data in Superset.
Deploy the Stackable Superset Operator
As before, you need to install the Operator:
stackablectl operator install supersetUsing Helm instead
helm install superset-operator stackable-stable/superset-operatorSet up dependencies
Like Druid, Superset requires an SQL database to run. To install a dedicated database for Superset use the Bitnami PostgreSQL Helm chart to deploy a PostgreSQL instance (like you did for Druid):
helm install superset-postgresql postgresql \
    --repo https://charts.bitnami.com/bitnami \
    --set auth.username=superset \
    --set auth.password=superset \
    --set auth.database=superset \
    --version 11.0.0
Superset will read the credentials from a Secret. Create a secret with the database credentials in it, in the key connections.sqlalchemyDatabaseUri. The secret also contains the information of the initial admin user:
kubectl apply -f - <<EOF
apiVersion: v1
kind: Secret
metadata:
  name: simple-superset-credentials
type: Opaque
stringData:
  adminUser.username: admin
  adminUser.firstname: Superset
  adminUser.lastname: Admin
  adminUser.email: admin@superset.com
  adminUser.password: admin
  connections.secretKey: thisISaSECRET_1234
  connections.sqlalchemyDatabaseUri: postgresql://superset:superset@superset-postgresql.default.svc.cluster.local/superset
EOF
Deploy the Superset cluster
Now deploy Superset:
kubectl apply -f - <<EOF
apiVersion: superset.stackable.tech/v1alpha1
kind: SupersetCluster
metadata:
  name: simple-superset
spec:
  version: 1.5.1-stackable0.1.0  (1)
  statsdExporterVersion: v0.22.4
  credentialsSecret: simple-superset-credentials  (2)
  nodes:
    roleGroups:
      default:
        config:
EOF| 1 | This is the version of Superset used for this instance. You can find the Superset versions supported by Stackable in the Superset Operator documentation. |
| 2 | This is the reference to the Secret you created earlier. |
On the first deployment of the Superset cluster, the Operator will also initialize the database. Once the database is initialized, you can connect to the cluster.
You can verify that the database is up and running with this command:
kubectl get statefulset superset-postgresql -o \
jsonpath='{.status.readyReplicas}'
It should return 1.
Set up port forwarding for the Superset web interface
You can also connect to the Superset UI:
kubectl port-forward service/simple-superset-external 8088And now point your browser to http://localhost:8088/ and you will see the login screen of Superset:
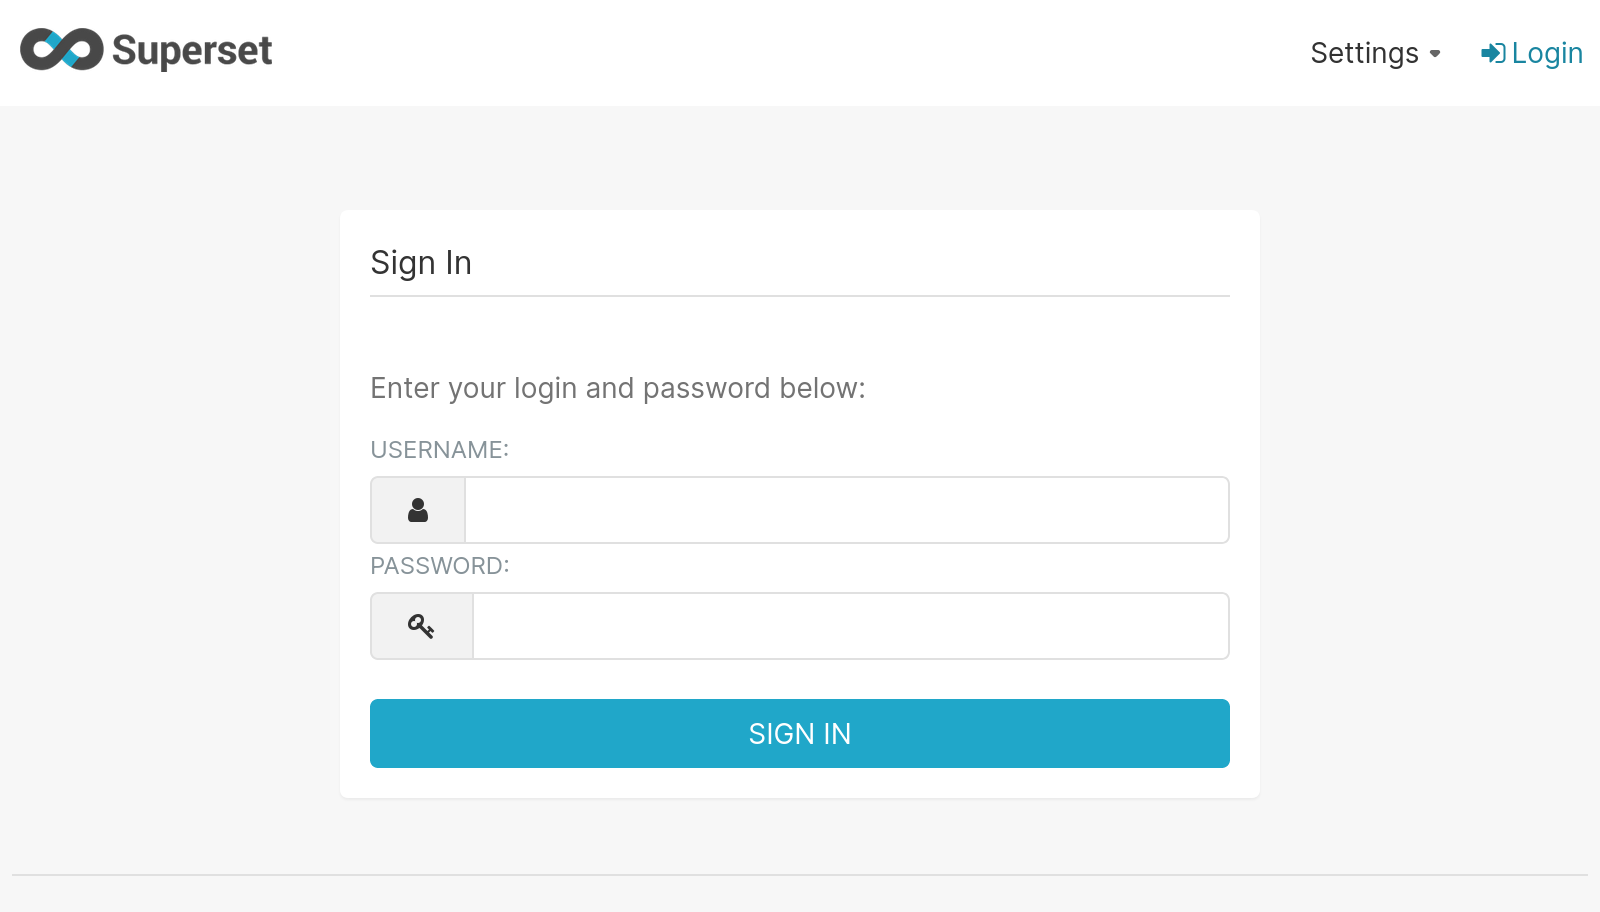
Log in with your admin user; if you have not chosen different credentials, the ones used above are username admin and password admin.
Query Druid from Superset
Now that Druid and Superset are running, it is time to connect the two. The Superset Operator takes care of that. Deploy a DruidConnection resource:
kubectl apply -f - <<EOF
apiVersion: superset.stackable.tech/v1alpha1
kind: DruidConnection
metadata:
  name: superset-druid-connection
spec:
  superset:
    name: simple-superset  (1)
    namespace: default
  druid:
    name: druid-nytaxidata  (2)
    namespace: default
EOF| 1 | The name of the Superset cluster |
| 2 | The name of the Druid cluster |
The Operator will create a job that adds this connection to the Superset cluster.
You can now find the Druid cluster as a data source in Superset. In the menu, under Data > Databases you should see the Druid cluster:
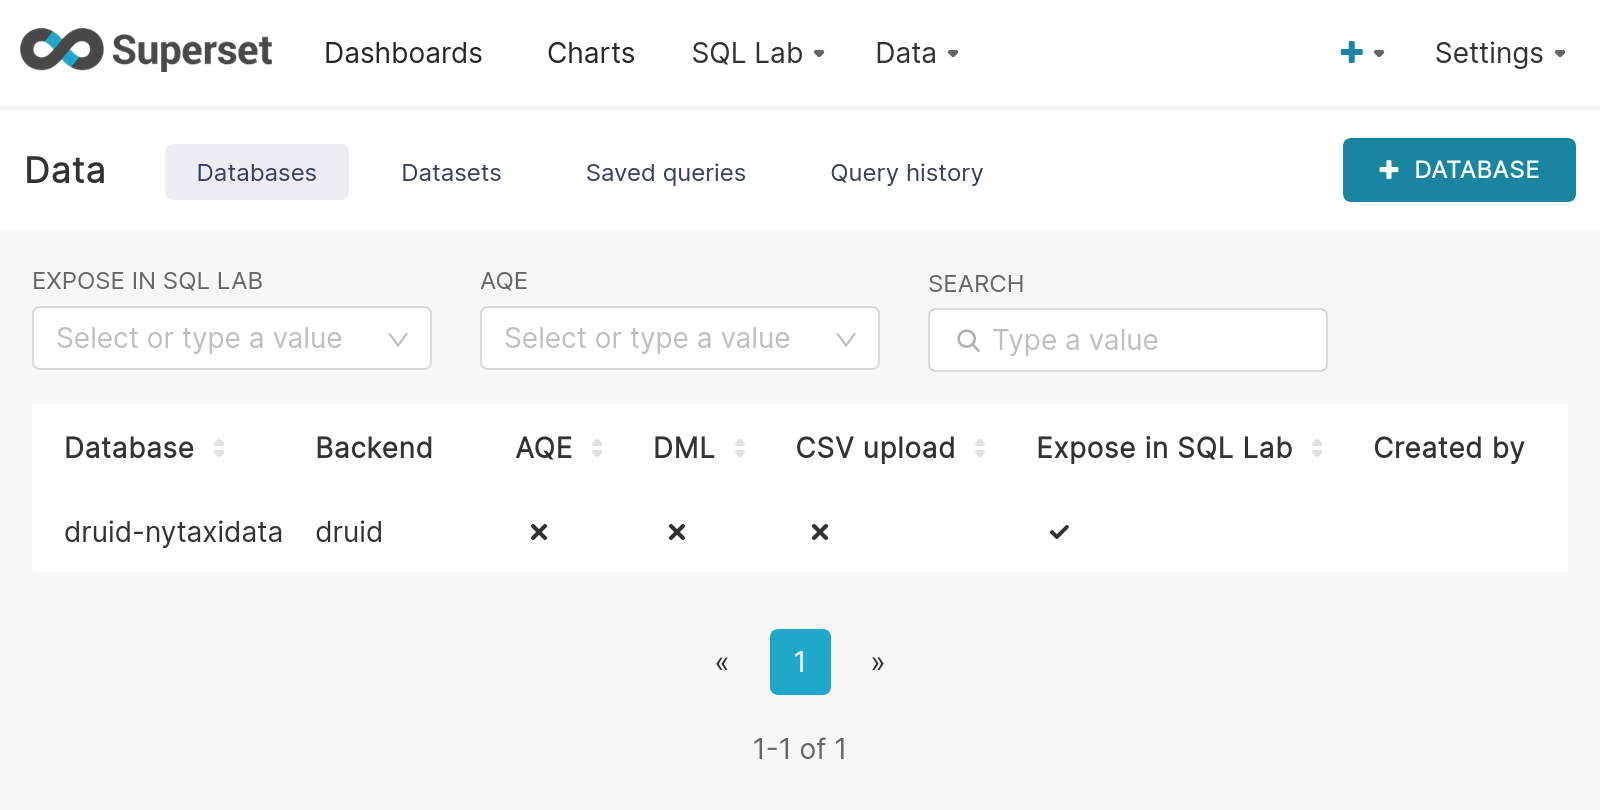
If you do not see your Druid instance, check the status on the DruidConnection you deployed (superset-druid-connection), it should be Ready.
|
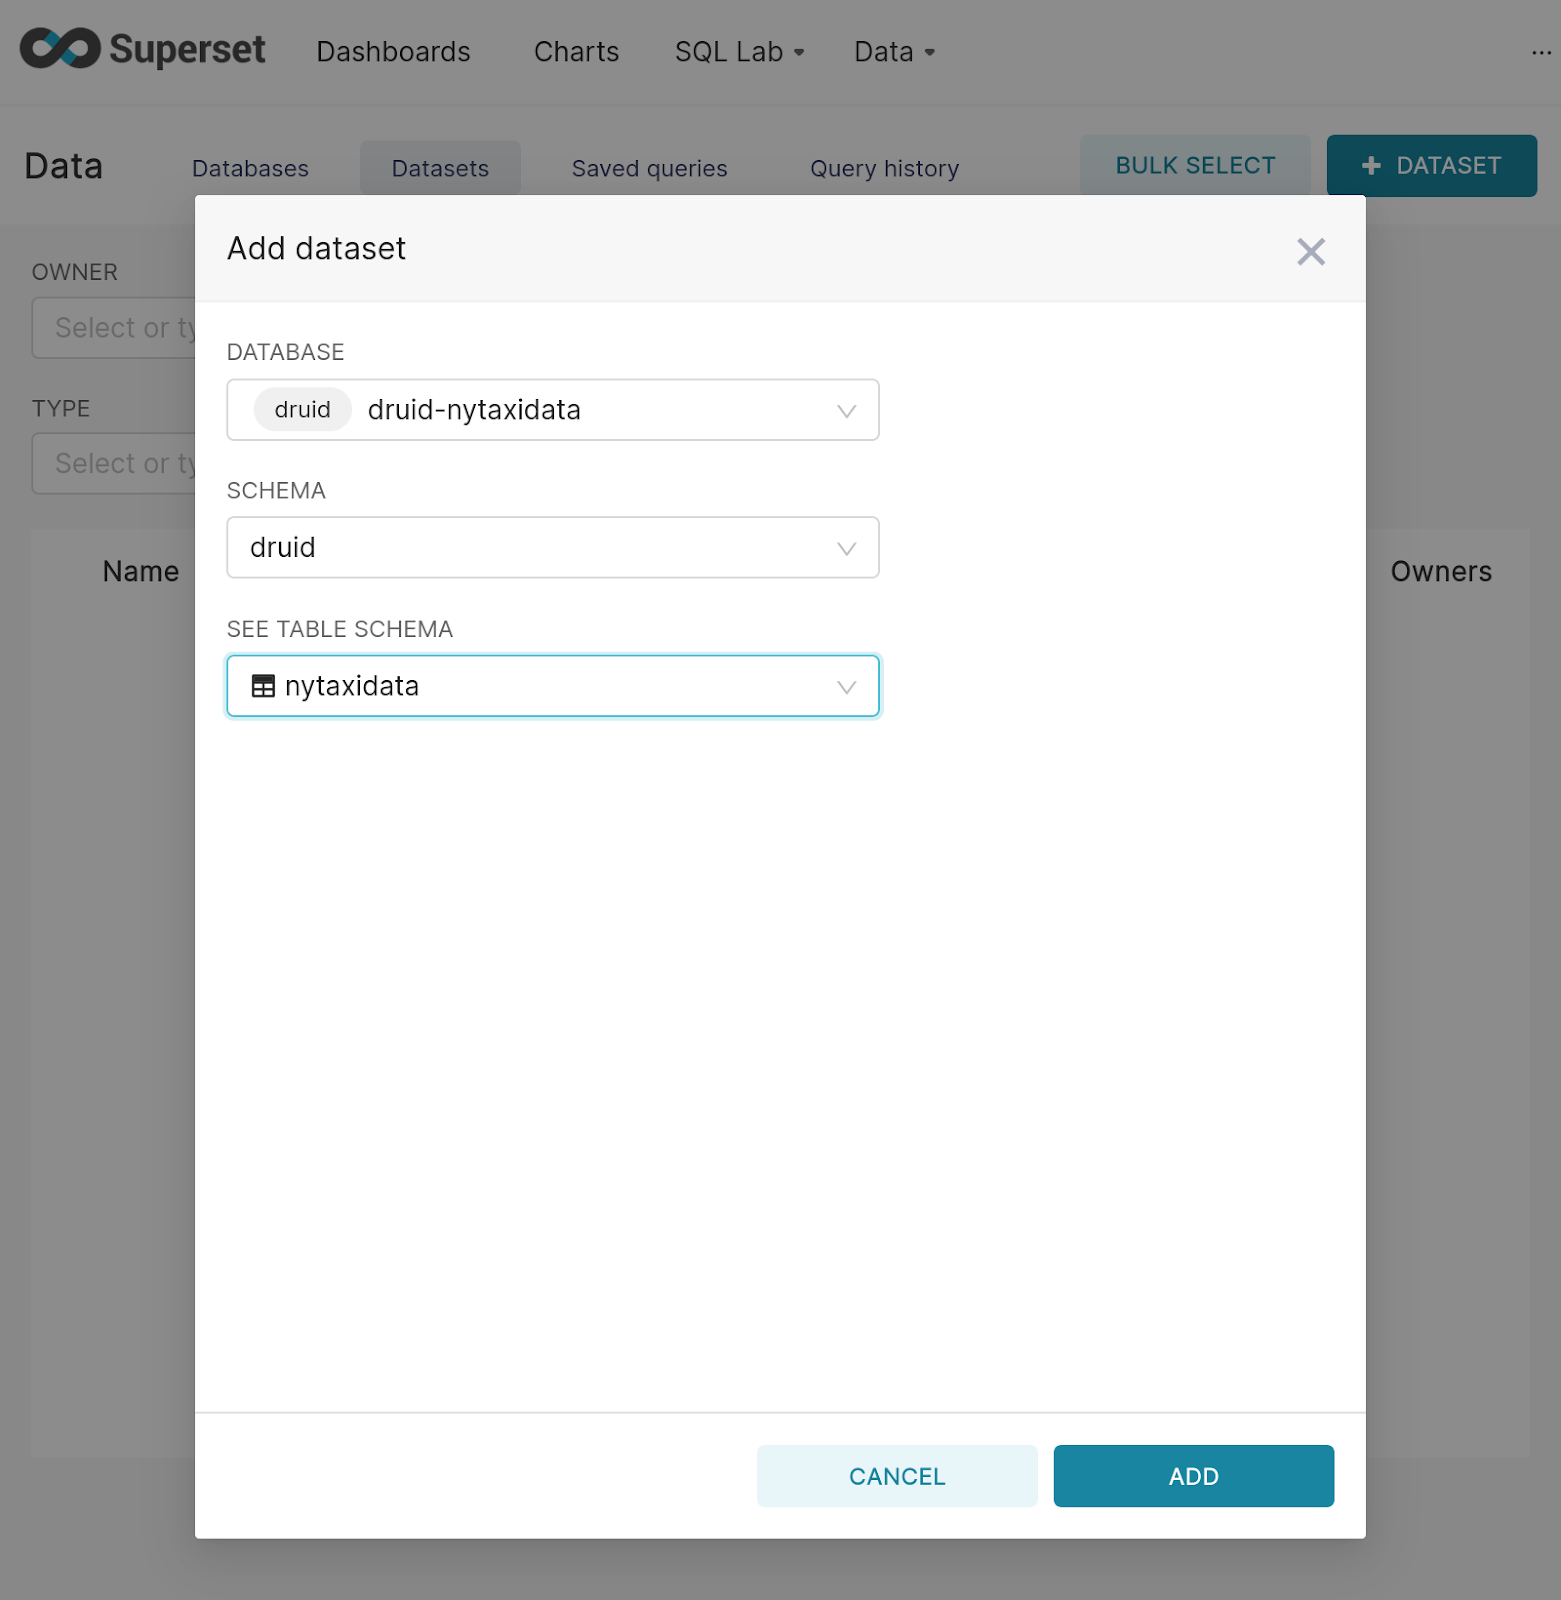
To read the data stored in your Druid database, create a dataset in Superset referencing the table. This is done under “Data” > “Datasets”:
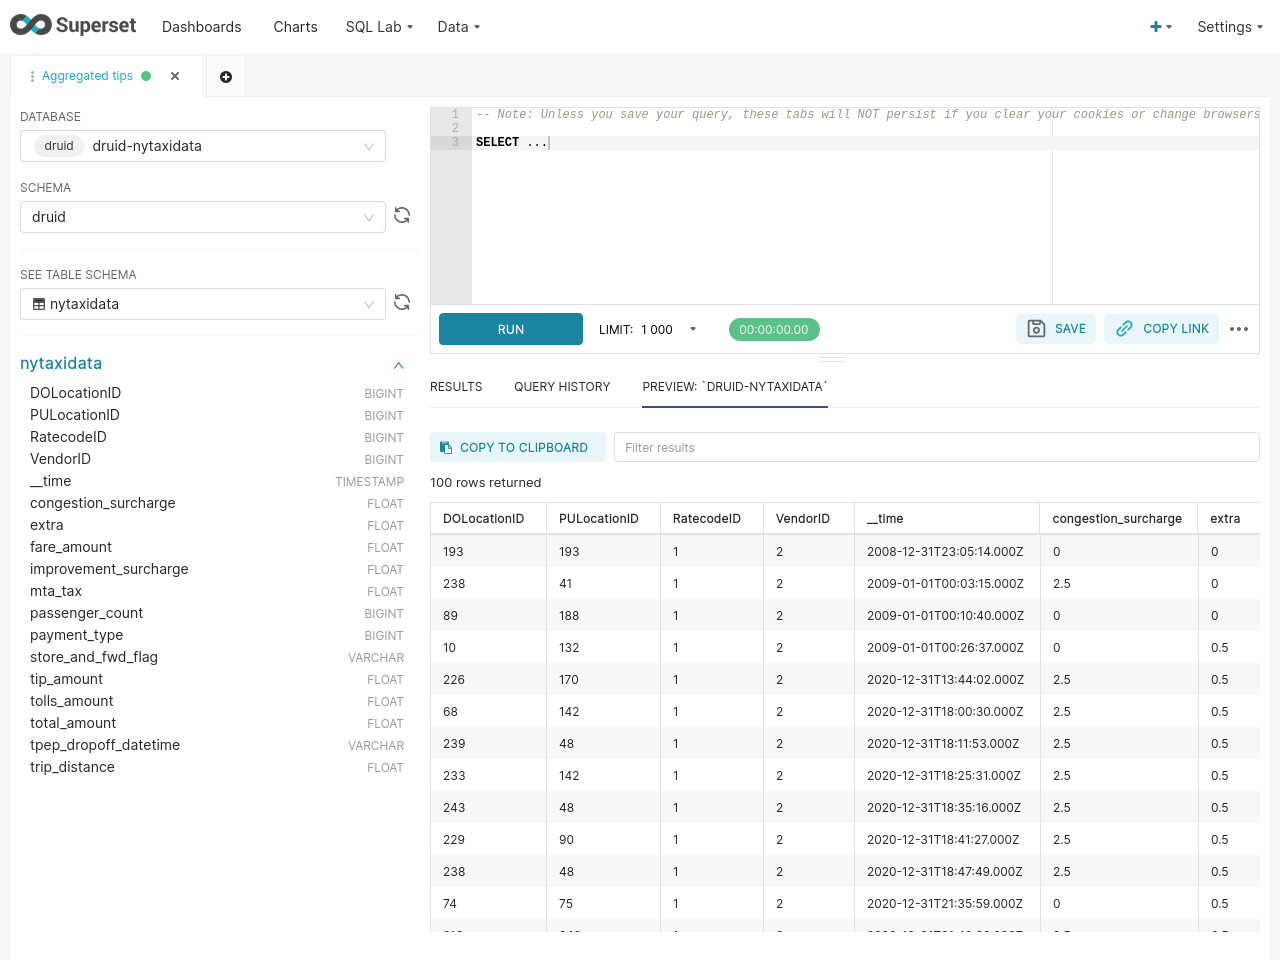
The data can be queried in SQL Lab → SQL Editor:
Data analysis and dashboards
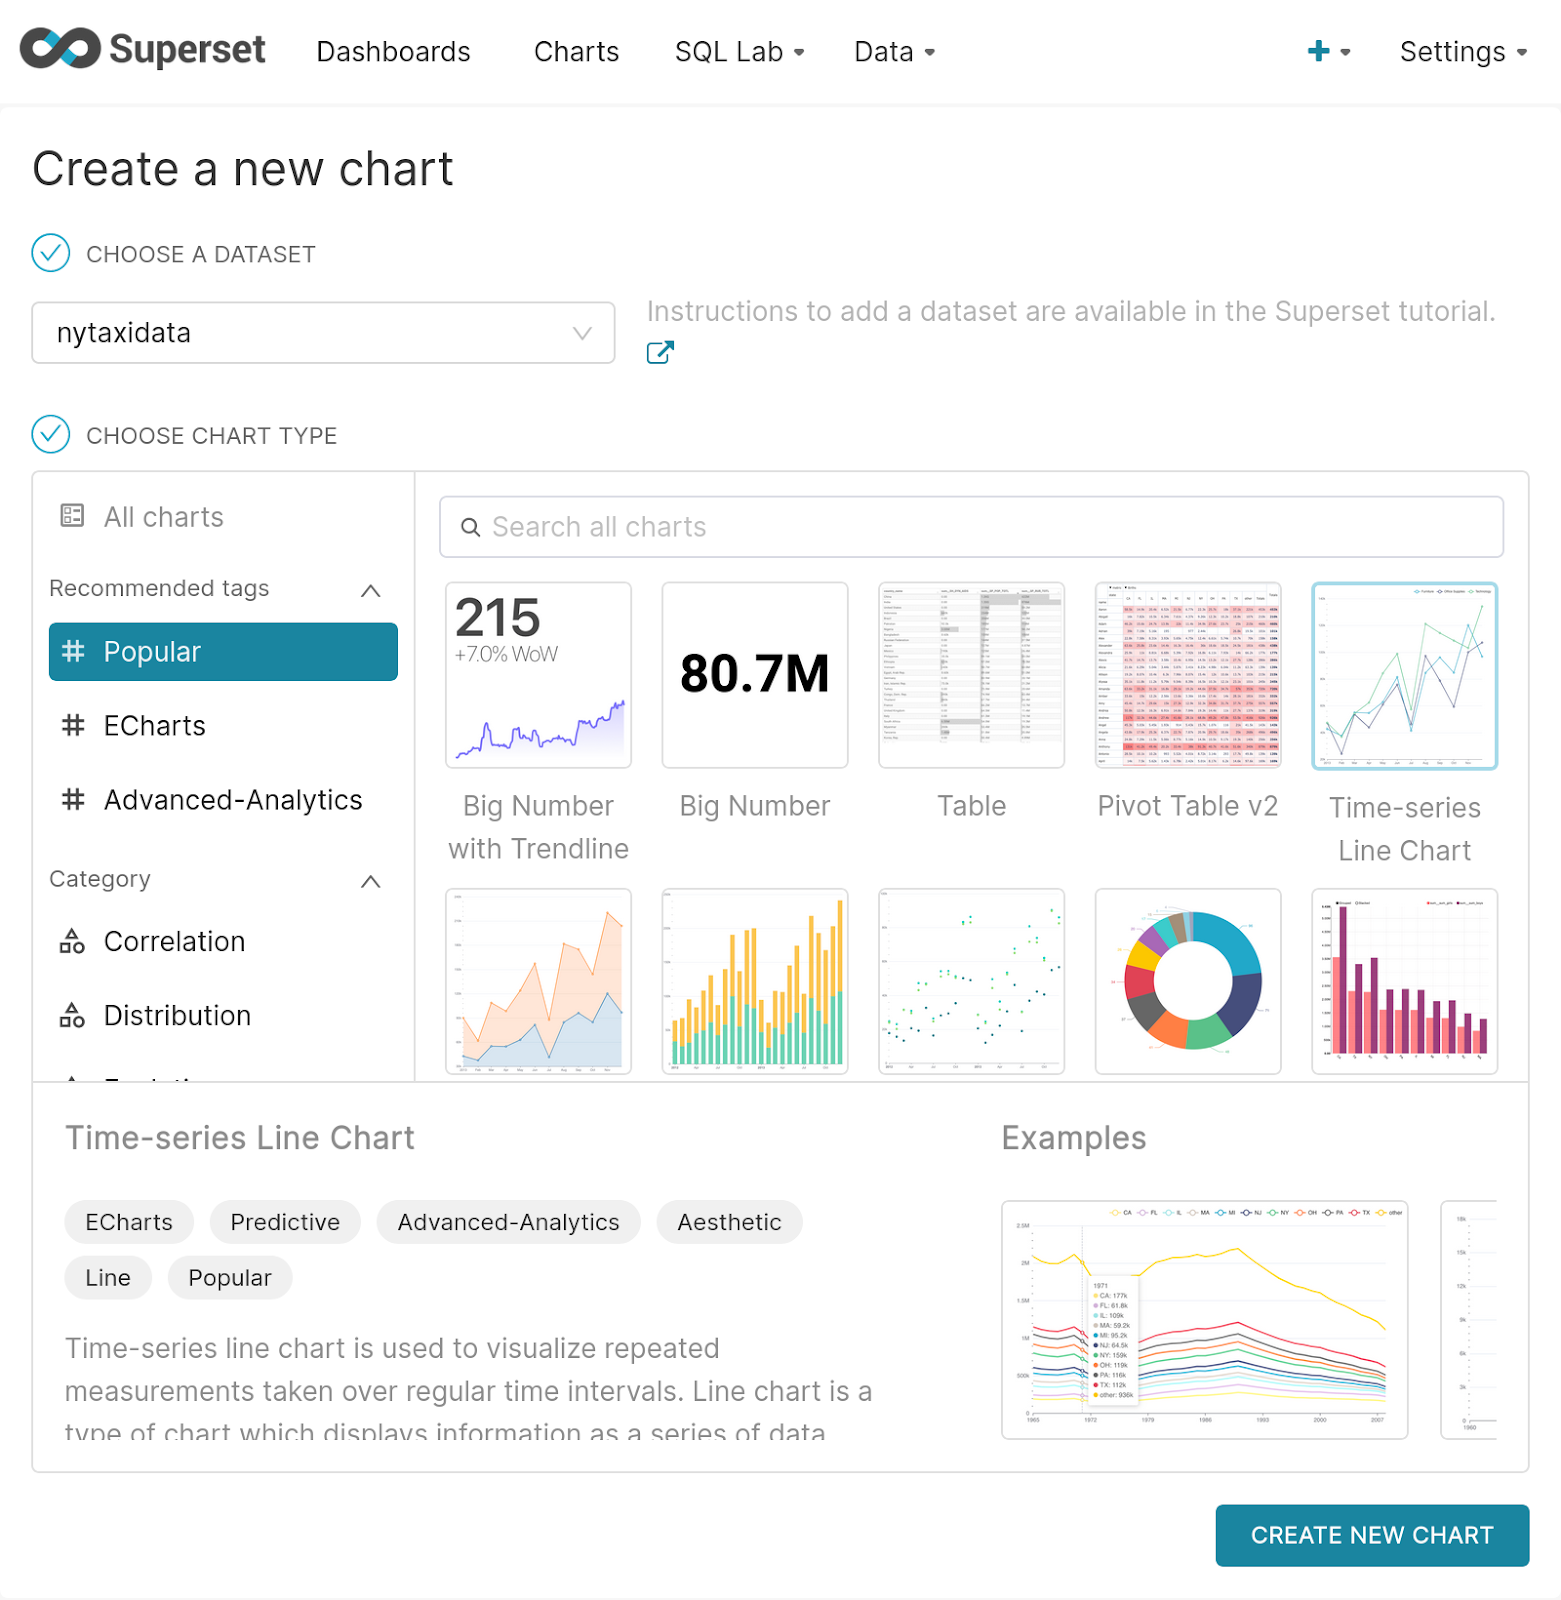
After defining the dataset, use it to create a chart for a dashboard:
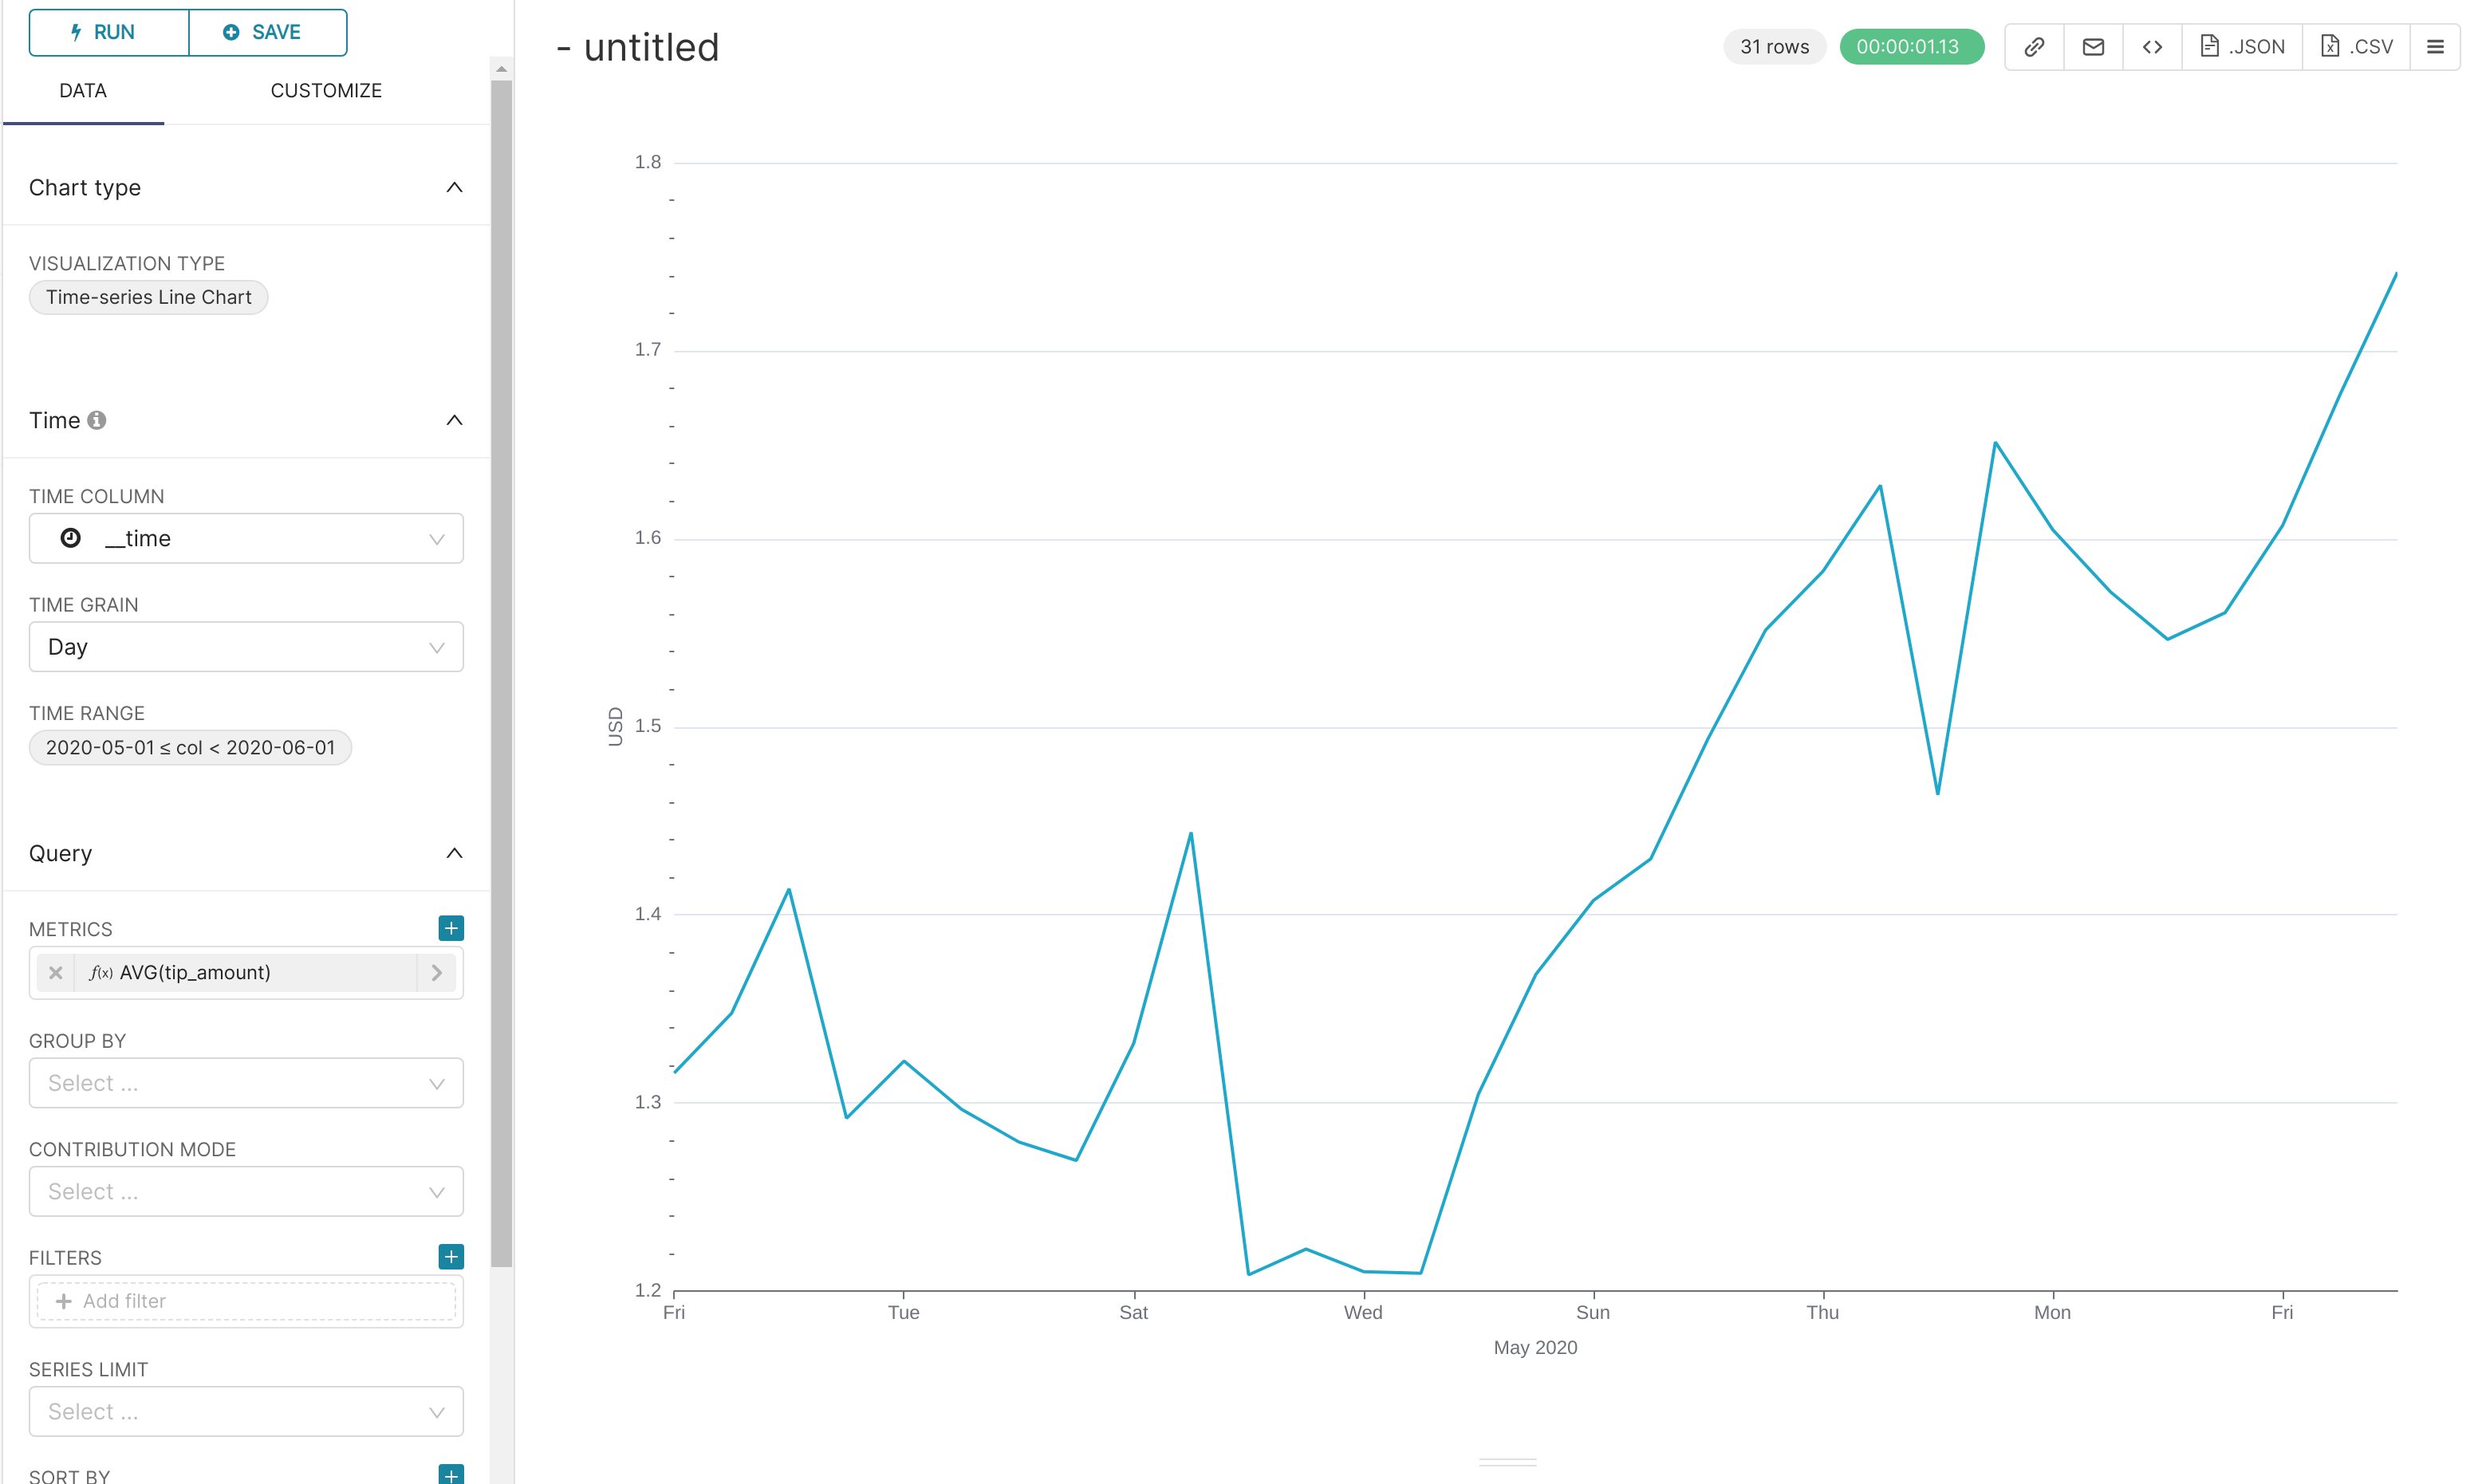
Create a simple time-series line chart. Applying these settings, you can see from the chart (and the average tip amount) that passengers are more generous towards the end of the month:
Settings
| the range has been set so that it matches the filter originally applied in the Nifi template. |
| Chart Setting | Value |
|---|---|
Time column |
|
Time range |
|
Metrics |
|
X axis title |
|
X axis title bottom margin |
|
Y axis title |
|
Y axis title margin |
|
X axis time format |
|
Finally, create a dashboard with this chart:
